Don't Go Chasing Waterfalls... Originally Published 2002
What exactly is it about moving water captured in photographs that is so captivating? I guess to answer that, you would have to first look at the qualities of water that are so attractive then put it into motion. For us, living and breathing creatures, water is an essential to life, and thus we are forever bound to it like the air we breath.
 |
Unlike the air we breath we can see water and feel it as it changes, we can hear it and some say smell it. In the case of air, seeing it and sometimes smelling it, is not always desired. I don’t know if I can ever answer those questions completely or simply. All I know is that photographing water either standing still like glass or rushing down as falls or rapids always draws my attention. Id like to point out , however, that waterfalls are definitely not the easiest subjects to photograph, yet not the hardest either, so a few simple steps and things pointed out for you to consider will more than likely put you on the right path to creating those milk or bridal veil waterfall effects that are so popular. Lighting... Lighting by and far, is key for making any successful photographic effort. All too many photographers tend to focus their attention on composition as it relates to subject, subject placement and the elements that make up a scene, but they tend to over look how important light is. When I head out to photograph waterfalls I as a rule, make sure I have considered the light I might have to work with. In any geographical area, lighting can change on a dime, so it helps to understand how certain lighting will affect the outcome of your pictures. When photographing most waterfalls, the absolute ideal lighting conditions is overcast days. Cloud cover acts as a diffuser, which allows the light to fall on the scene completely evenly, which in turn results in a more balanced image, with contrast inmind. |
There are certain conditions where direct sunlight is favorable, however. Waterfalls, which have dramatic backdrops, are much better suited for clear days when the whole scene can be fully appreciated. Complications with lighting come into play when there are either scattered clouds, or no clouds, and objects, which cast shadows on the scene (trees, cliffs, etc), surround your subject. Bright sunlight and shadows in the same scene doesn’t present an issue for human eyes, but because no camera film or digital has anywhere near the Dynamic Range of the human eye, pictures of the same scene will not appear the same. In situations like these, it can be hard to produce a good picture, so don’t get your hopes up. The best advice is to take a few shots at different shutter speeds, metering off of different areas of the scene, and hoping for the best.
ISO Considerations
The ISO setting in your camera is nearly a paramount consideration. The ISO setting of the sensor you use with your camera determines a great deal of how your waterfall photographs turn out. High ISO settings produce higher noise – essentially the same as grain in high ISO films, but more pronounced. For waterfall photography, use the slowest speed (lowest number) possible. This is usually ISO 50 or 100, for many of the top level cameras and ISO 100 or 200 on the entry level cameras. Not only does this increase the amount of detail, it also increases the amount of light necessary to make a proper exposure, and allowing for longer exposures.
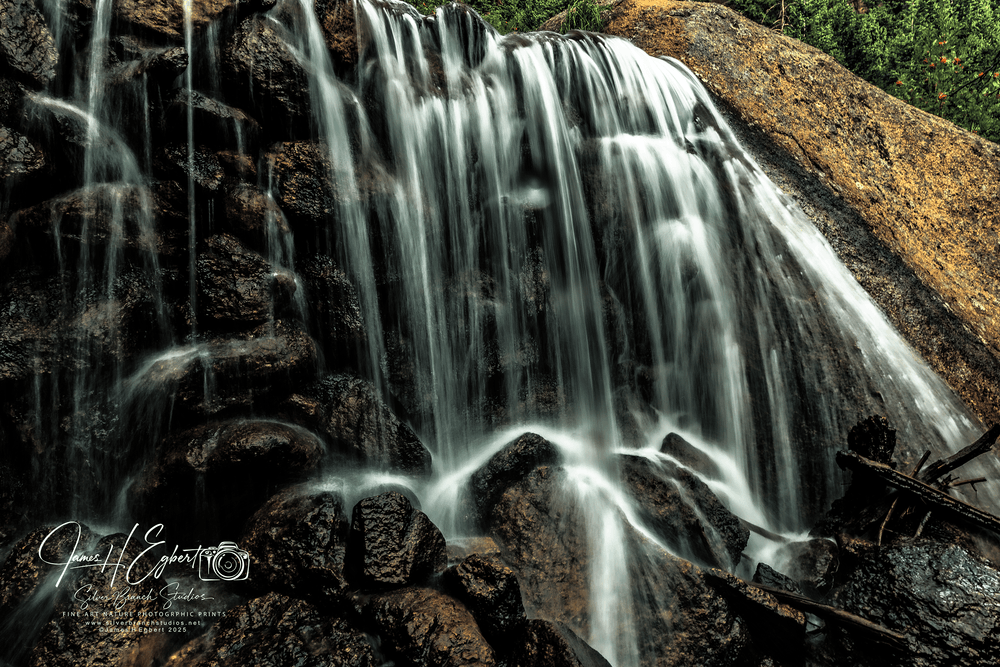
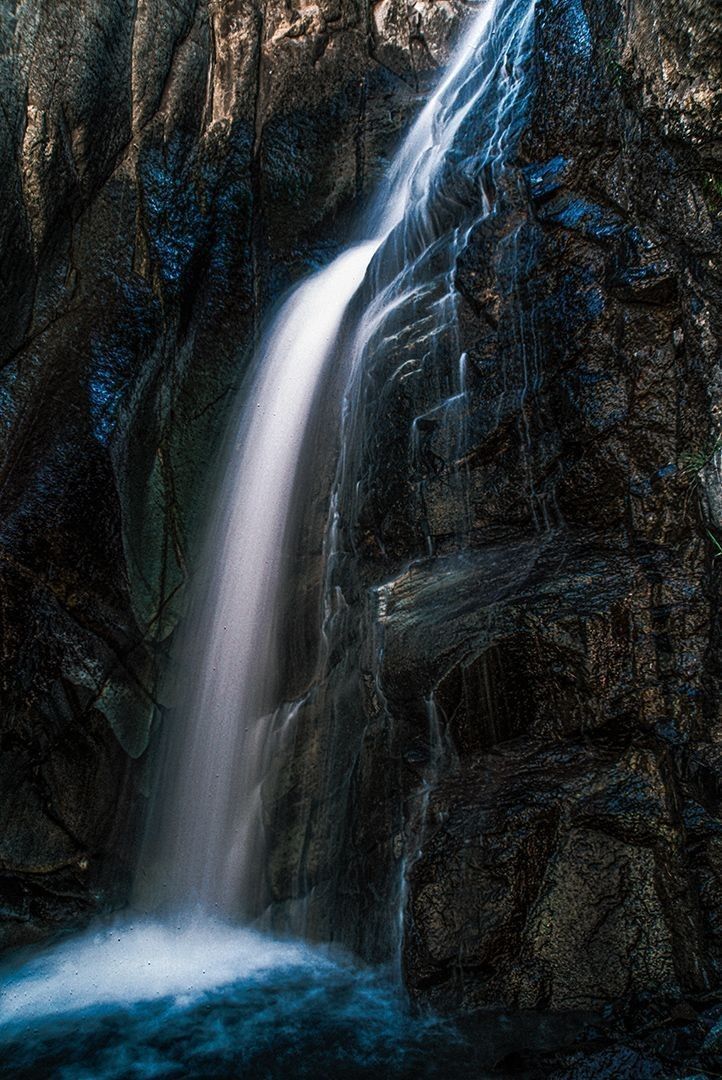
Taking the Right Amount of TimeI like to compare this to cooking. All too often many red meats and fish are over cooked. In some cases, they are undercooked as well, so finding the right combination of temperature and time is essential. I like to think of exposure as hot sauce or spices. Too much and you get burnt and too little, well, we dont want too little either. Here’s where you ask yourself, “Self? Why would I want longer exposure?” Well, slow shutter speeds result in the silky “wispy milk or angel hair” effect commonly seen in waterfall pictures.
Most professional photographers use long exposures on waterfall studies at some point or another in their career The resulting pictures have a much more delicate or peaceful feeling. Not all waterfalls are good studies for slow shutter photography, however. For waterfalls of either great height or volume, slow shutter speeds more often than not serve to lessen – or even mute altogether – any feeling of power which faster shutter speeds may convey. Here is where you ask, “So when do I use one and when do I use the other”? Just keep reading.. Longer shutter speeds are generally best used for waterfalls with small volume, heavy contact with bedrock, small resolving pools or in isolation studies.
There are, of course, exceptions to this thinking the Big Thompson River Falls in Rocky Mountain National Park comes to mind – but in the broadest sense, smaller waterfalls are much more conducive to slow shutter photography. One thing to keep in mind is that the taller the waterfall, the longer it takes the falling water to blur evenly. There are many photographers who subscribe to the rule of exposing about 1 second for every 100 feet of height in the waterfall. In some cases, longer exposures are necessary. For smaller waterfalls, shutter speeds from about one 10th of a second and slower will achieve the proper blurring of the water.
Now, before I get too far, it really isn’t the water that is streaking and causing those white wisps of joy we want to photograph. It is tiny air bubbles in the water stirred up by rocks, branches or other debris as the water falls over the edges and into the base of the falls. Some call it froth, like that of a cold glass of beer or a nice hot cup of cappuccino.
Fast shutter speeds usually offer the best results used to convey the power or size of a waterfall. For some of the tallest waterfalls, a fast exposure can much more clearly define both the size of the falls, as well as the force and directions the water falls in. Fast exposures typically work best in brightly lit scenes, or scenes where the lighting is uneven and not desired. Fast exposures should also be used if you don’t have a tripod to work with, because it is impossible to hand hold a camera steady enough to preventimage blurring. Shutter speeds of 1/60th of a second or faster will all but negate the need for a tripod.
The camera’s aperture works in conjunction with the shutter speed as with most any other subject matter to obtain the desired results. For slow shutter photography, the aperture should always be stopped down as far as it can be – usually anywhere between f/11 and f/32. Not only does this ensure that the scene is completely in focus, it also decreases the amount of light entering the lens, which increases the necessary length of the exposure. I personally feel that when photographing waterfalls, the aperture should be restricted to the smallest size possible to maintain a sharp scene overall. In brightly lit scenes, this may not always be the case, however, so just experiment, bracket your exposures, and see what works.
Filters
The most important filter to carry when photographing waterfalls is the Polarizer. Polarizing filters do two things: saturate the colors of the image, and reduce or remove glare on reflective surfaces. The one catch with polarizers is that they only work to maximum efficiency at a 180 degree angle to the light source (in this case, the sun), so if the sun is in front of you, a Polarizer will be useless, but if it’s behind you, it will work perfectly. In terms of waterfall photography, the Polarizer is best for reducing glare on wet rock next to the waterfall itself, to help focus attention on the waterfall. If foliage around the waterfall, or whatever you are photographing, is wet, the polarizer will reduce the glare on the leaves, and make the greens stronger as well.
A Graduated Neutral Density Filter (ND Grad) is necessary to take balanced pictures of sunsets, or scenes where half of the frame is brightly lit and half is shaded. Usually this filter isn’t terribly useful for photographing waterfalls, but there are several outstanding cases.
Composition
Discussing composition is like telling someone how to breathe. Composition is highly individual, yet there are a few basic things you might want to keep in mind. If you’ve ever taken a class on photography, you’re most certainly aware of the rule of thirds. Those of you who don’t know what that is, the basic concept is to divide the image into three equal parts using whatever natural lines there are, so that horizon lines aren’t dead center in the image, but rather top or bottom centered. Further, offsetting the focalpoint of the image to the left or right of the center of the frame also adds a significant amount of interest to the composition.
Another thing to consider is the use of line such as an S curve where the subject, in this case the waterfall flows through the scene in a serpentine fashion creating a more interesting scene. Another line is the diagonal where the scene subject starts in one corner of the frame and traverses through to nearly another. The one element I have never heard was the good book rule. I like to think of waterfalls as a good book with a beginning a middle and an end, yet there can be a cliff hanger! In any case try to get as much of the water fall in the frame and always, I mean ALWAYS look out for those elements in the shot that are scene killers!